Tuesday, 25 August 2015

The Periodic Table

It seems I can't hold L off any longer.  I've been promising to start chemistry as soon as we finished DNA and genetics, however L was just too curious about this whole periodic table thing to wait any longer.

The great thing about learning chemistry these days is that there are so many incredible resources out there.  This post will be mainly about sharing all of these amazing resources that we are using.

The first thing that I think is a must is this fantastic free periodic table printable.
You can download it here.


You can also print off cards to go with each element.  They are perfect for different card games, organizing elements by different groups etc.  Even though the cards have the atomic symbol on them I printed them out again for L to match.  One note is that they take an incredible amount of ink.  I only printed out about half of them and we are now out of ink so the rest of the cards are "pending".

I think my all time favourite resource is this super catchy periodic table song.

https://www.youtube.com/watch?v=zUDDiWtFtEM

L has taken it upon herself to learn it all!  She's about a 3rd of the way through at the moment.  If you google words for the song you can print them out which makes learning it a lot easier.  Of course this is if you can handle hearing it 24/7!

Another resource that is not absolutely necessary but super cool is an app called The Elements.  It is an interactive periodic table.  You can click on each element and there is a write up plus different real life examples of the element.  I can't do the greatest job explaining it but check out this youtube video


https://www.youtube.com/watch?v=dy5spdfugx4

I went for the full bundle and got Elements, Molecules and In Action.  I also got the free app goReact in which you can choose different elements and make your own chemical reactions.  Very cool.  L enjoys exploring the different elements and seeing how they react with each other.

We also got the book The Periodic Table: Elements with Style by Simon Basher out from the library.  L is not a fan of the illustrations at all but has flipped through it a bit.  Others who are in to this kind of comic book type style might really dig it.

Learning chemistry is so different from the days when I was in high school and things were as boring as could be!

Monday, 24 August 2015

DNA-replication, translation and transcription


This whole DNA business can be a pretty complicated subject, however there are so many amazing resources these days that it makes learning about it fairly accessible.

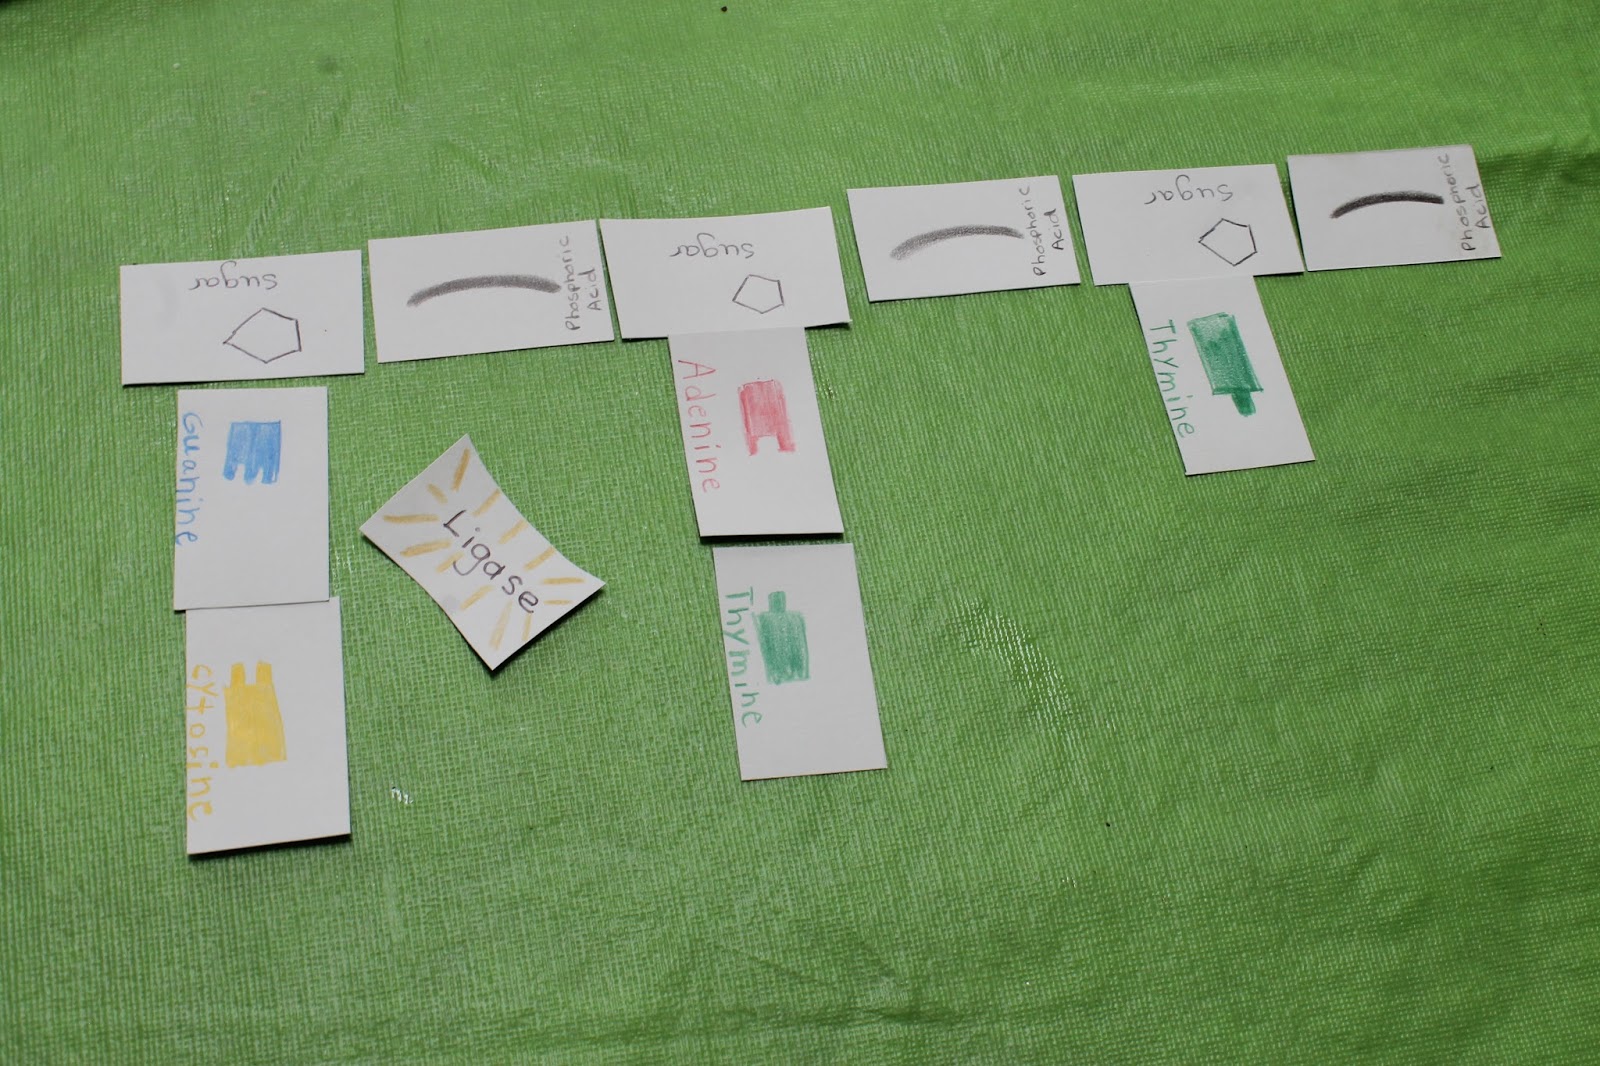
For DNA replication we started off with this great video which really simplifies the whole process and makes it easy to understand.   I added in the enzymes as well as some other cards necessary to split apart our DNA and replicate it.

I've taken some pictures of how we applied it to our DNA game.  I'm sure some of you with sharp eyes can spot my grave error on two of the bases.  I just set this up quickly to take demo pictures and by the time I noticed the error I didn't want to retake all the pics.  Just think of it as a mutation!

 Anyhow you start of with the helices splitting things apart.  I'm not going to explain the whole process here as you can just watch the above video to see how it works.  


By the end we have found the extra bases to complete the new strand and have replicated our DNA.  L found this a great way to really see how the whole process works.

We also did a worksheet on transcription and translation that can be found here.
L found this easy as we'd already played the transcription game which helped us to learn how the DNA is turned into RNA and then the RNA bases are read in codons(or groups of 3) to make up an animo acid.  These amino acids combine together to make a protein.  It all sounds very complicated but the game makes it so much simpler.  

Wednesday, 22 July 2015

Extracting DNA from a Strawberry

Yay!  We finally got to do the ever popular extracting DNA from a strawberry experiment.  For those of you who don't know how to do this here is a blow by blow.

Preparation: put a strawberry and some rubbing alcohol in the freezer over night.

First off get a plastic ziplock bag and add the frozen strawberry, 5ml of dish soap, 2.5ml of salt and 25ml of water.  

 Seal the bag and start crushing everything together.  This part was super fun.  L crushed for about 5 minutes.

Cut a small hole in the corner of your bag and pour your solution into a test tube about half way.

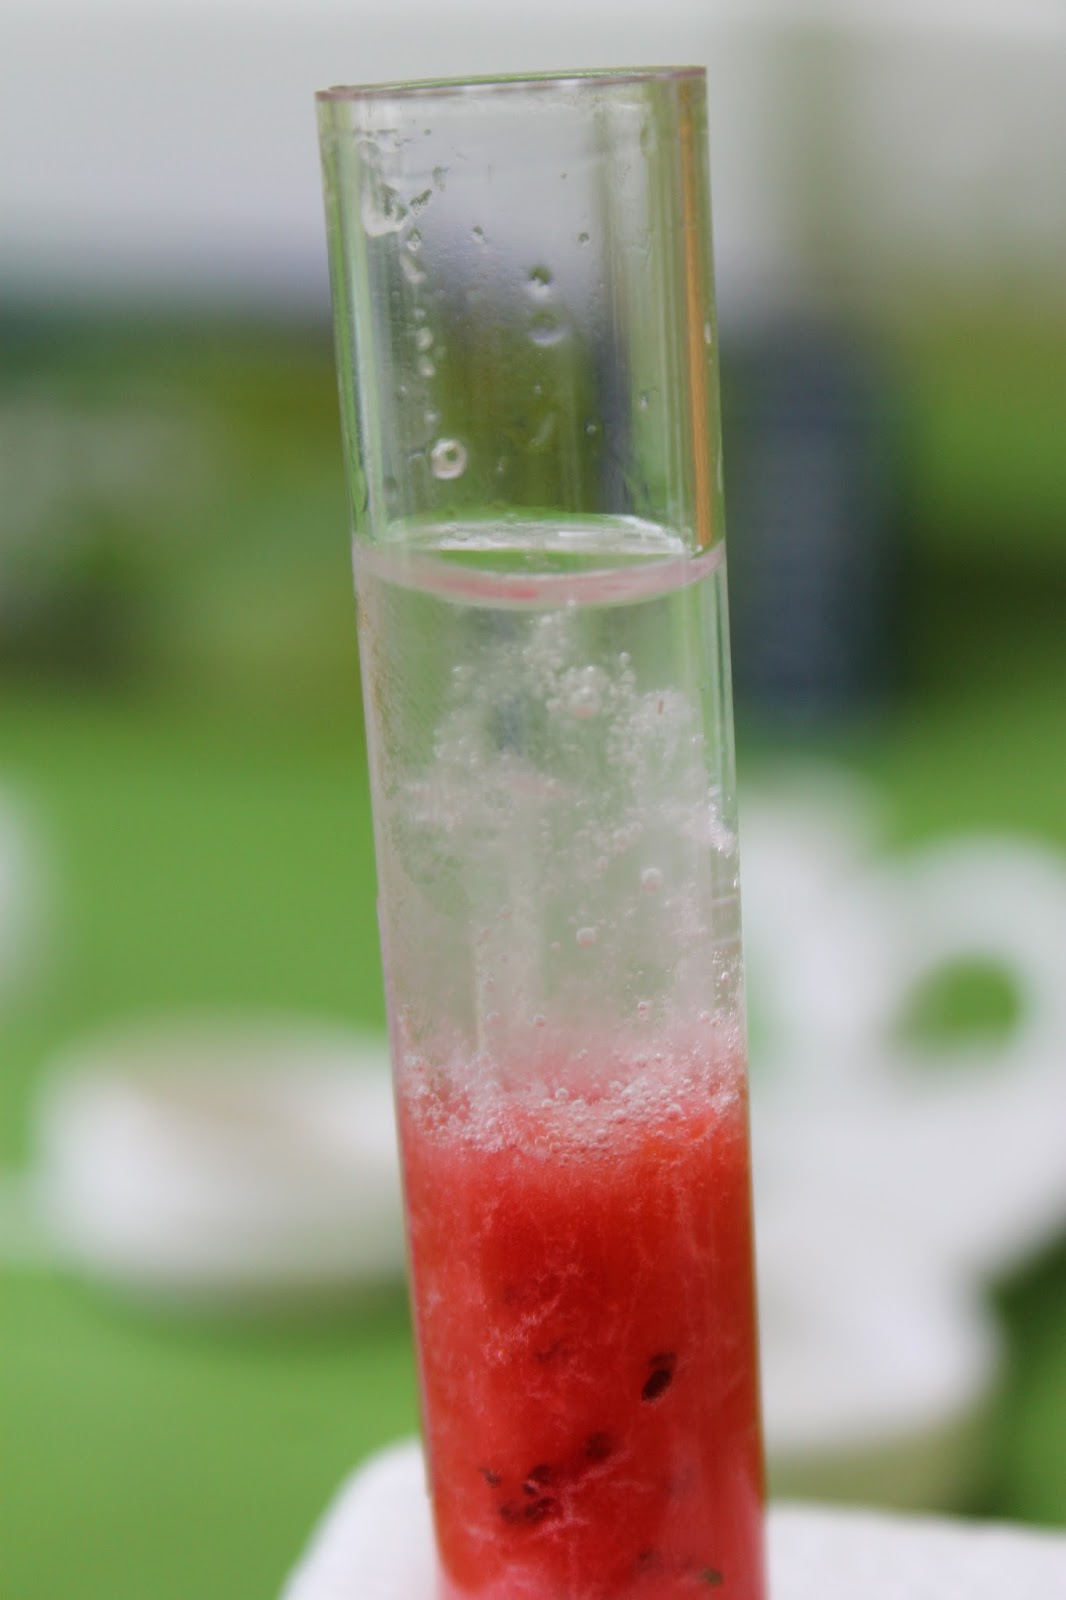
Then add the ice cold rubbing alcohol until the test tube is 3/4 full and watch the magic happen!  You can see the DNA separating.  L was super excited.

Carefully extract a strand from the solution.  L placed it in a petrie dish but later moved it onto a slide for further investigation.

How cool to check it out under the microscope.  I had to explain to L that we wouldn't actually be able to see the double helix since we just have your average microscope and we'd need nanotechnology for that.  She still though what we could see was pretty cool.


Monday, 6 July 2015

The DNA Game

Let me just start off by saying that I majored in chemistry in high school.  I know very little about biology and next to nothing about DNA, certainly not to the depth L is going.  Soooo I've had to do quite a bit of before hand research for some reference tools.

Of course the first thing L wanted to do is to build the famous double helix DNA model.  I'd found all sorts of different examples on Pintrest and we were all set to break out the pipe cleaners and beads when....

Side note here.  

Last October L got the Thames and Kosmos Genetics and DNA kit for her birthday in anticipation of our DNA studies.  I'd never really looked at it closely until we were about to do our model.  Well much to my delight they actually have a real plastic model you can make!  Yippee they also have a wonderful explanation of how DNA is built and how it goes together.  Using this and the BC Science 9 textbook L was able to create the DNA model.  It was a bit of a two person job to get it twisted correctly so all the bases fit together.

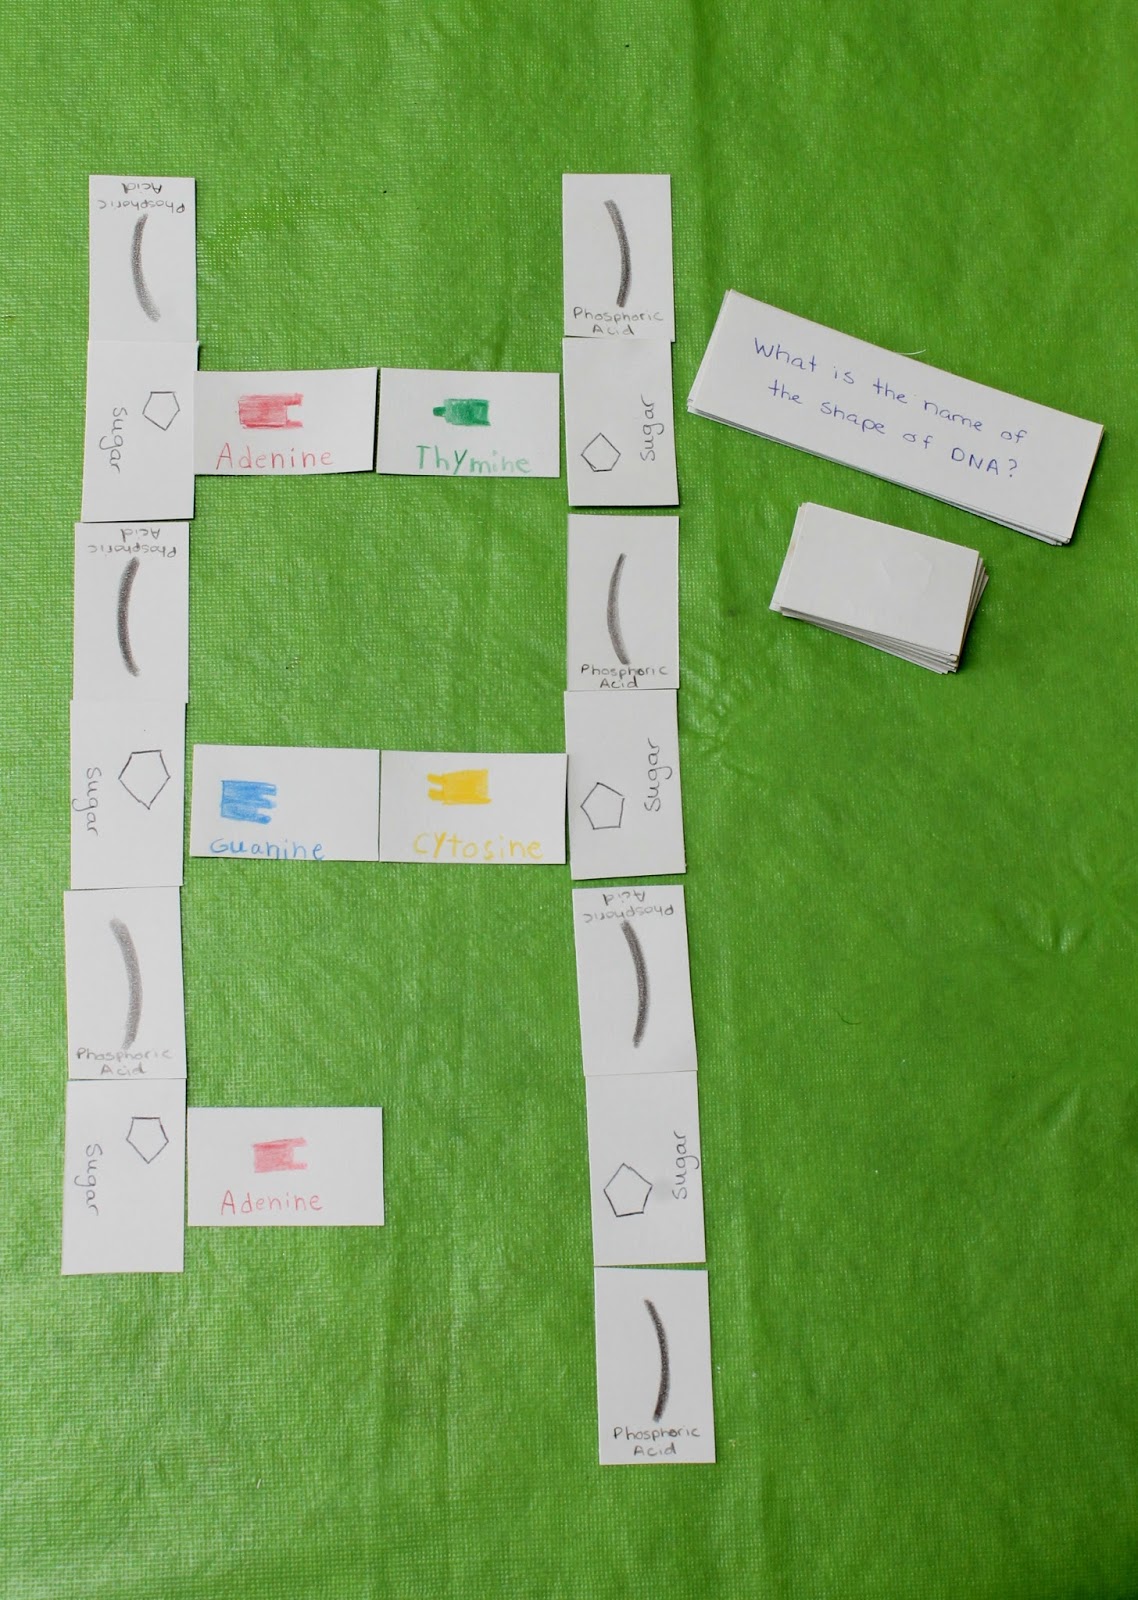
 After completing the model L had a good idea of the bases A and T and C and G joining together like rungs on the ladder and the sides being made up of phosphoric acid and sugar but all of those names are hard to remember.

I came up with this simple DNA game to remember the names of the bases and to really get a visual of how DNA is constructed.  L and I made up cards for the 4 bases and some sugar and phosphoric acid cards.  I also made up some question cards which contained questions like : What is the shape of DNA?  A: double helix.  I also had a lot of questions on the functions of the organelles of a cell.  


For the game play you work as a team to build a strand of DNA.  Each player takes 7 cards.  You take turns laying down a card to create the DNA structure.  If you don't have a card that works you have to answer a question.  If you answer correctly you pick up cards until you can go.  You basically continue on until neither player can go and you have your completed DNA strand.  This game worked wonderfully to help to remember all of the correct terminology as well as certain questions that needed review.  I keep changing the questions as we learn more information.

Stay tuned to see how we used the DNA game to learn about replication....

Human Anatomy-Cells

I know a lot of people start with the cell when studying human anatomy but I decided to do it the other way round and cover all of the major systems first before delving deeper into the human makeup.
We have been eagerly anticipating getting to this part and the following studies on DNA, genes and genetics.  

I found this amazing activity on Pintrest ages ago and we finally got to try it out.
We printed out the templates and I traced them with black sharpie onto shrinky dink paper.  L then coloured all of the different organelles with pencil crayons.  I can't think of a better way to learn the parts of the cell.  They are so wonderfully tactile.


We watched several different videos on cells and got a great DVD from the library from Squibs called  Cells, DNA and adaptation.  It was composed mostly of a bunch of songs and raps all about cells and their functions.  I actually found a lot of it to be over my head but L loved it!  She was out dancing around the back yard making up the "cell rap".  Lets just say she really knows her organelles and their functions!

Sunday, 5 July 2015

Human Anatomy-Eyes and Ears

 It's been a while since I've been able to update this blog but we have been carrying on with our human anatomy study.  We started off with the ear.  L decided she didn't want to make a model of the ear this time so instead we watched some Youtube videos on how the ear works and it's parts and then she coloured in the diagram pictured below.  We did a fun experiment to see how the ear drum works.

L covered a bowl with cling film to represent the ear drum and put a few grains of rice on the top.  She then banged loudly on a cookie sheet with a wooden spoon.  It was cool to see the grains of rice jump up and down as she banged the sheet.  This represented how sound causes the ear drum to vibrate which then sends messages to your brain about what you are hearing.


Next up the eye.  After looking at some diagrams and watching a Youtube video on the eye L made this super cool model of an eye.  I cut a ping pong ball in half and cut a small circle in both sides.

L added all of the parts using different household items.  We actually used wool to needle felt the iris as well.  L used sticky notes to label all of the parts which was quite a challenge as the model was so tiny!  She even added eyelashes and lids using electrical tape.


After making the model we did the fun experiments from this site .  It was so neat to find our blind spot and figure out which of our eyes were dominant.  

Sunday, 5 April 2015

Human Anatomy-Skin


We've been learning all about the largest human organ.  That's right the skin!  It really is fascinating how important this organ is.  
L started off by watching this video on the skin from Youtube.  I can't stand this series but L thinks they are hilarious.
I found this fun experiment that measures how sensitive different areas of our skin are.  L used invisible thread, embroidery thread and yarn on different parts of her participants bodies such as the cheek, elbow and palm of the hand.  She had the subject close their eyes and she gently touched the tip of the invisible thread to the part of the skin.  If the subject didn't feel anything she would move on to the embroidery thread and then the yarn.  L recorded her results in the following chart.
This was a fun experiment to show how different parts of our skin are more sensitive than others and we talked about why that might be.

Next L did the super fun and gross experiment of covering her whole hand in white craft glue.  After waiting for it to dry she slowly peeled it off.  It just happened to be April Fool's Day so she played a gruesome trick on her granny.  The next day L examined the fake skin under the microscope and we talked about how each person has unique finger prints and how they can be used for identification.

Then it was time to make a model of her own.  I printed off a diagram of the layers of the human skin for L and she had tons of fun making this human skin model out of a sponge, felt and embroidery thread.